Quick Start
Before we can get started with Honeycomb, we must make sure our machines have the required prerequisites for Honeycomb to run.
1. Install a Package Manager
There are some prerequisites that are required across all operating systems to run Honeycomb. We will be using a package manager to install these dependencies.
MacOS Package Manager (Homebrew)
Paste the following in a macOS Terminal and press enter to install Homebrew, then follow the steps in the terminal screen.
/bin/bash -c '$(curl -fsSL https://raw.githubusercontent.com/Homebrew/install/HEAD/install.sh)'
When this command is run, additional installations may be automatically added by Homebrew based on your machine's configurations. Homebrew will prompt you to Press RETURN to continue or any other key to abort. Please continue with these installations by pressing Return
Set up Homebrew on your PATH
To make Homebrew available in your shell, we need to add the Homebrew installation location to our PATH. This should be done automatically on macOS 10.14 Mojave or newer. For older versions, or to do it manually run the following command in your terminal.
echo 'PATH="/usr/local/bin:$PATH"' >> ~/.bash_profile
If you're using zsh, also add to your ~/.zshrc file.
Windows Package Manager (Chocolatey)
Chocolatey is a package manager for Windows - essentially the equivalent of Homebrew for MacOs. It installs software from the command line and makes updates much easier. Run Powershell with administrator privileges and paste the following command:
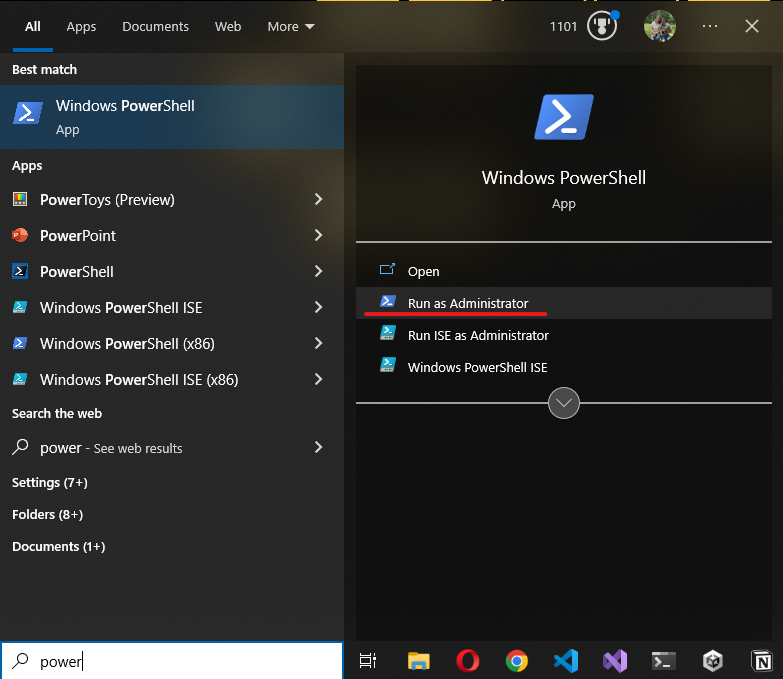
Set-ExecutionPolicy Bypass -Scope Process -Force; [System.Net.ServicePointManager]::SecurityProtocol = [System.Net.ServicePointManager]::SecurityProtocol -bor 3072; iex ((New-Object System.Net.WebClient).DownloadString('https://community.chocolatey.org/install.ps1'))
2. Start your new task from our template repository
To start a new task locally, in development mode follow these steps:
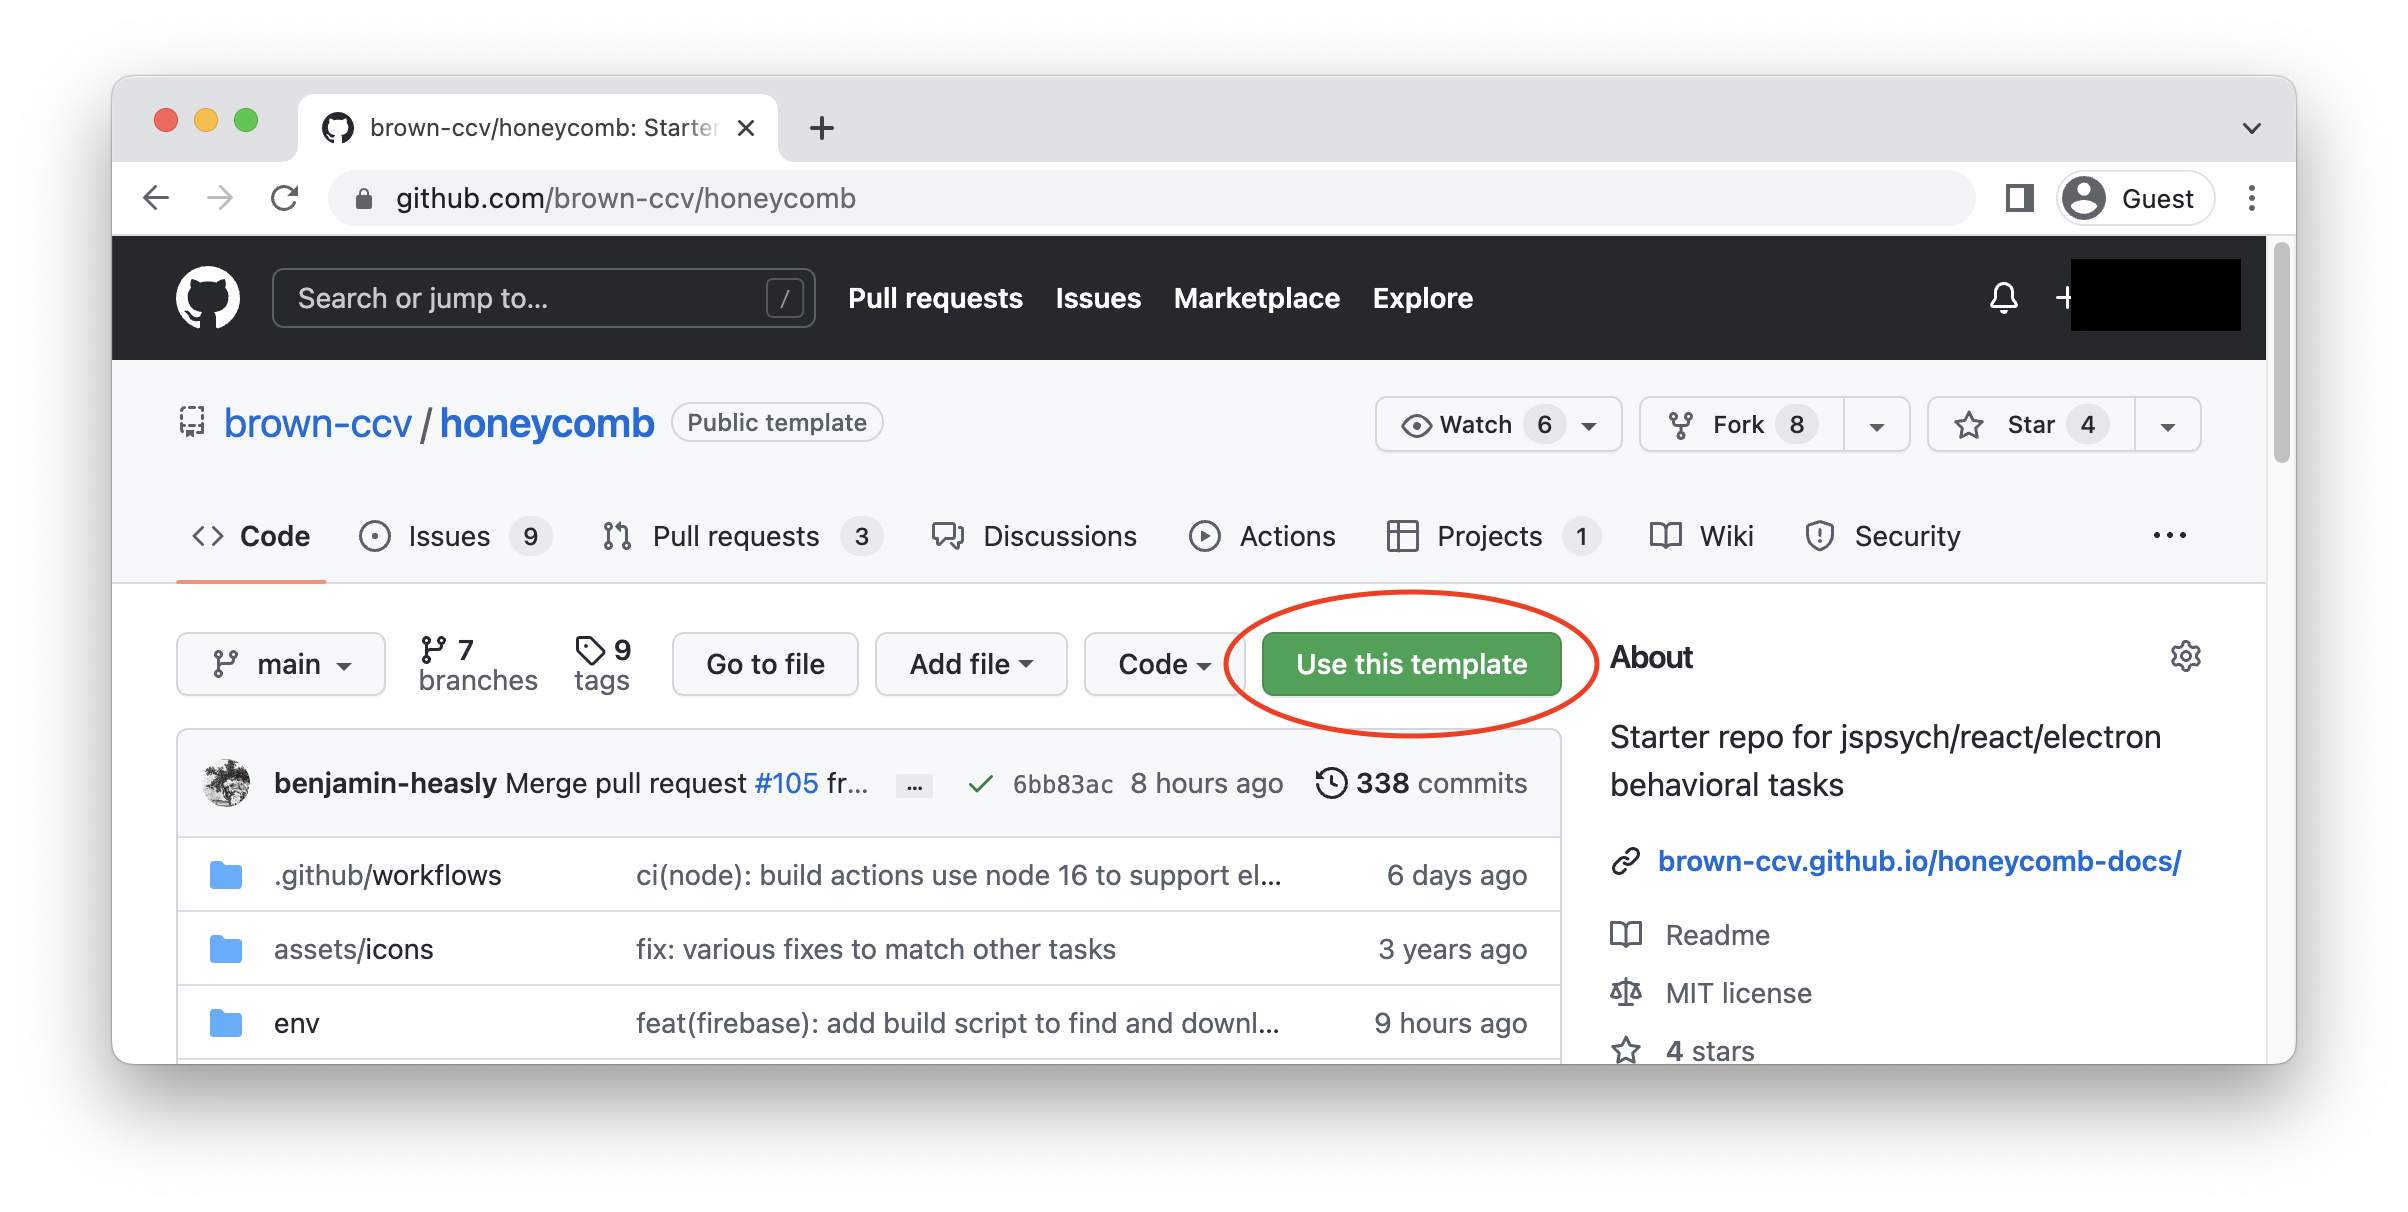
The simplest way to get started is creating a new repository using Honeycomb as a template. This option will allow you to generate a new repository with the same directory structure and files as an existing repository.
Creating a repository from a template is similar to forking a repository, but there are important differences:
- A new fork includes the entire commit history of the parent repository, while a repository created from a template starts with a single commit.
- Commits to a fork don't appear in your contributions graph, while commits to a repository created from a template do appear in your contribution graph.
- A fork can be a temporary way to contribute code to an existing project, while creating a repository from a template starts a new project quickly.
Go to https://github.com/brown-ccv/honeycomb and click on Use this template on the top right.
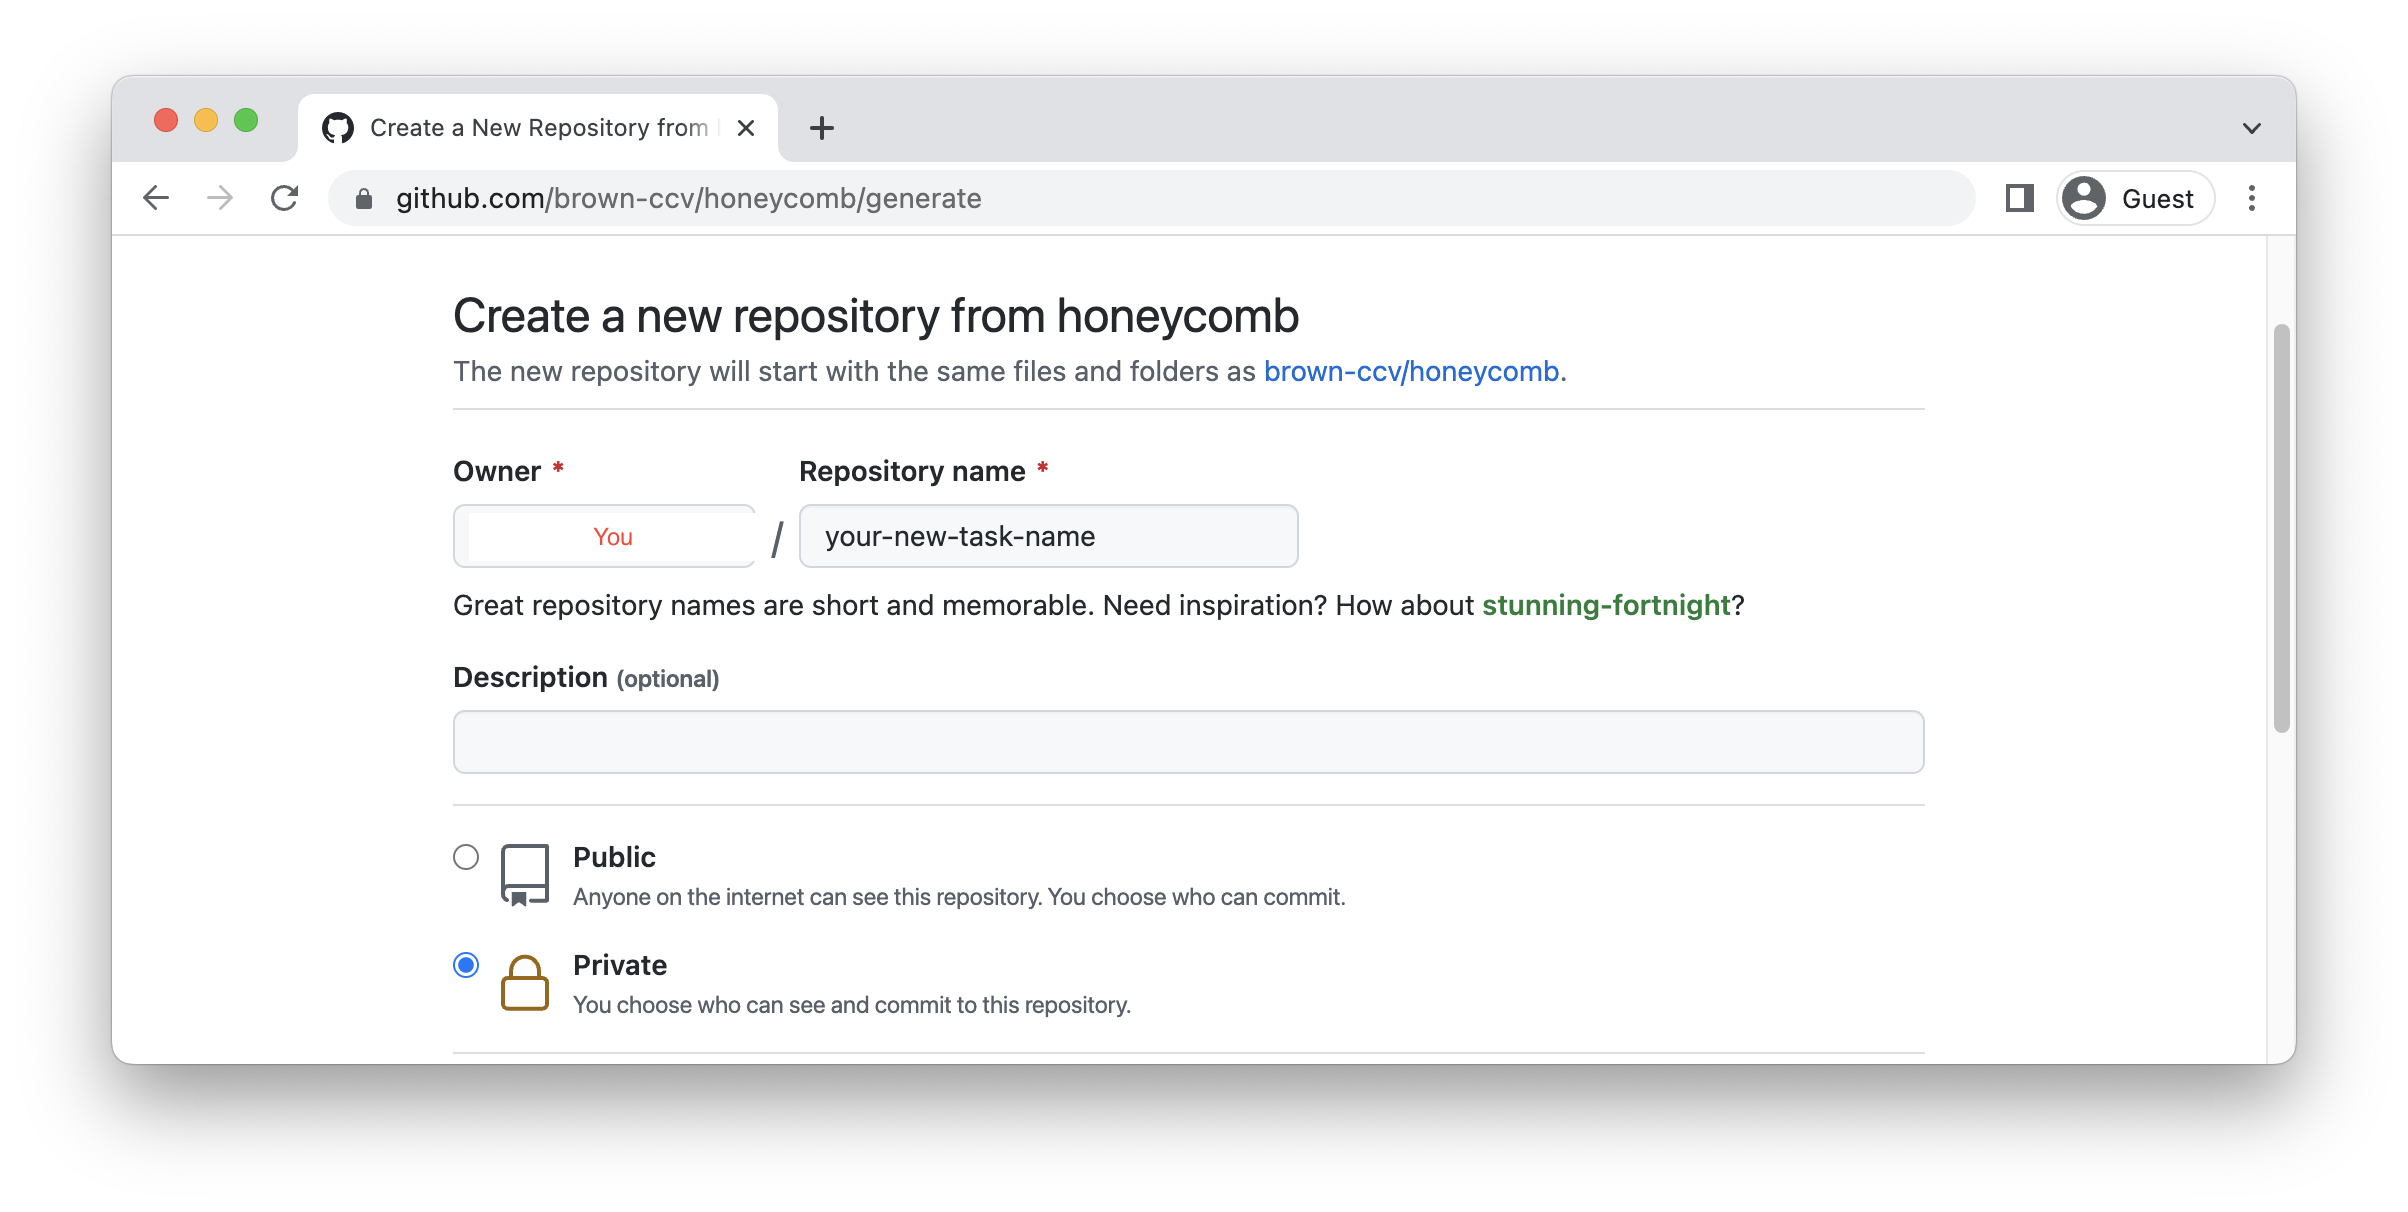
Then select the organization and the name of your repository and click on create repository from template.
Alternatively, you can use GitHub CLI to create a new project based on the Honeycomb template repository. First, install GitHub CLI (https://cli.github.com/), then run on your terminal:
gh repo create your-new-task-name --template brown-ccv/honeycomb
You can now move into the directory that was just created
cd your-new-task-name
3. Install Prerequisites
Running Brewfile (macOS)
A Brewfile is a script that developers can use to install multiple software tools that are required to run an application.
brew bundle
This will call the brew command which will install all the listed packages to your project.
Using Chocolatey (Windows)
Chocolatey will install multiple software packages if given a configuration file. The honeycomb template repository includes one! See Setup Details for more information about using chocolatey.
choco install chocolatey.config
Python on Windows
In addition to the packages installed by Chocolatey you need to complete your Python installation using pyenv. Please complete the steps in Python on Windows before continuing.
4. Change name and description
It's best practice to create a new branch whenever we look to make changes and/or add a new feature. Your IDE may have a way to do this or it can always be done on the command line.
git checkout -b <branch-name>
Open package.json and edit it to reflect your app name and description (e.g. name, author, repository). Save your changes and commit them to git:
git commit -m "Commit message goes here!"
Checkout the Version Control page for more information about working with git
5. Install NPM Packages
npm is a command-line utility for Node.js that makes it easy for you to install packages and maintain them throughout the lifecycle of your application. With Node.js installed in Step 0, we are now able to utilize the npm command in the terminal.
Please run the following command to trigger the installation of all the dependencies relevant to this project:
npm install
Honeycomb, like most applications, contains a template called package.json. This file contains three distinctive parts that we interact with using a series of npm commands.
Metadata
{
 "name": "honeycomb",
 "description": "all-in-one task starter app with jsPsych + React + Electron + psiturk ",
 "author": {
   "name": "Brown CCV",
   "email": "ccv-bot@brown.edu",
   "url": "ccv.brown.edu"
  }
}
The metadata provides information about the project such as the name, author and description.
Dependencies
"dependencies": {
  "@brown-ccv/behavioral-task-trials": "^2.0.0",
  "@fortawesome/fontawesome-free": "^5.9.0",
  "bootstrap": "^5.2.0-beta1",
  "electron-log": "^4.4.8",
  "electron-squirrel-startup": "^1.0.0",
  "event-marker": "git+https://github.com/brown-ccv/event-marker.git",
  ...
}
Dependencies are packages that the project rely on for it to function properly.
They are formatted in specific key/value pairs where every key is a name of the package and the value is the version range that’s acceptable.
Note: If any changes are made to the dependencies section of the package.json, you must run npm install again to download the newly updated list of dependencies.
Scripts
"scripts": {
  "commit": "git-cz",
  "postinstall": "node version.js && npm run rebuild",
  "start": "cross-env BROWSER=\"none\" NODE_PATH=\"./src\" react-scripts start",
  "start:browser": "react-scripts start",
  "test": "react-scripts test",
  "prebuild": "electron-rebuild",
  "build": "react-scripts build",
  ...
}
The scripts section contains a number of commands you can run.
Check out the NPM Scripts page for more information about the different scripts you can run.
6. Run the task in dev mode
npm run dev
This will launch an electron window with the task and inspector open. It will hot-reload whenever changes are made to the app.
Scripts on Windows
Windows users must use a Git Bash terminal to execute scripts such as npm run dev. This is because node scripts are designed to execute on a Unix style command line environment but neither Command Prompt nor PowerShell are Unix based.
Check out these instructions to set git bash as your default terminal on VS Code.
7. Learn about configuring your task for different environments
HoneyComb tasks can be configured to run as a web app in Firebase, as desktop application via electron, to receive port signals from EEG, cameras, foot pedals and more. To learn more about how to configure your task for these different scenarios, see the Configuration Section.
8. Check out the data
The data is saved throughout the task. When running as a Desktop App, data is saved to the user's app directory. When running as Web App in Firebase, data is stored in the FireStore.
For a Desktop App, the location of the is logged at the beginning of the task wherever you ran npm run dev. Data is also stored in a folder that is generated by the app, which should be found on the desktop.
9. Quit the task
If you want to quit in the middle of the task, you can use these keyboard shortcuts:
Ctrl+W (for PC/Windows)
Cmd+Q (for Mac)
Partial data will be saved.
10. Run automated tests
Automated tests can tell a user whether the code is working as expected or if recent changes have broken previous functionality. Running automated tests is a good idea whenever you're getting started, merging updates, or making custom changes.
To run the tests interactively:
npm test
Or non-interactively:
CI=true npm test
Testing on Linux
When running npm test on Linux, you might get an error that mentions ENOSPC. This is because the test runner creates "watchers" for files in the project repo in order to automatically re-run tests as the files change. Linux limits the number of watchers that can be created at a time and the default limit may be smaller than the number of files in the repo.
This is a "known issue" with some test runners on Linux, as in discussions here and here.
One simple workaround is to increase the number of allowed watchers (100000 seems to be sufficient):
- Command that initially fails with
ENOSPC:npm test - Check the configured limit on "watchers":
cat /proc/sys/fs/inotify/max_user_watches - Edit the relevant Linux config file:
sudo vim /etc/sysctl.conf - Add a line at the end of the config file:
fs.inotify.max_user_watches=100000 - Save, exit, and reload the config file:
sudo sysctl -p - Check that the limit has changed:
cat /proc/sys/fs/inotify/max_user_watches - Retry the initial command, which should now succeed:
npm test