Quick Start
Creating Your Task Repository
The Honeycomb repository is a template and serves as the starting point for all tasks. Creating your repository from the template starts your project with the same directory structure and files as an existing repository.
Go to the Honeycomb repository
Click on
Use this templateand selectCreate a new repository.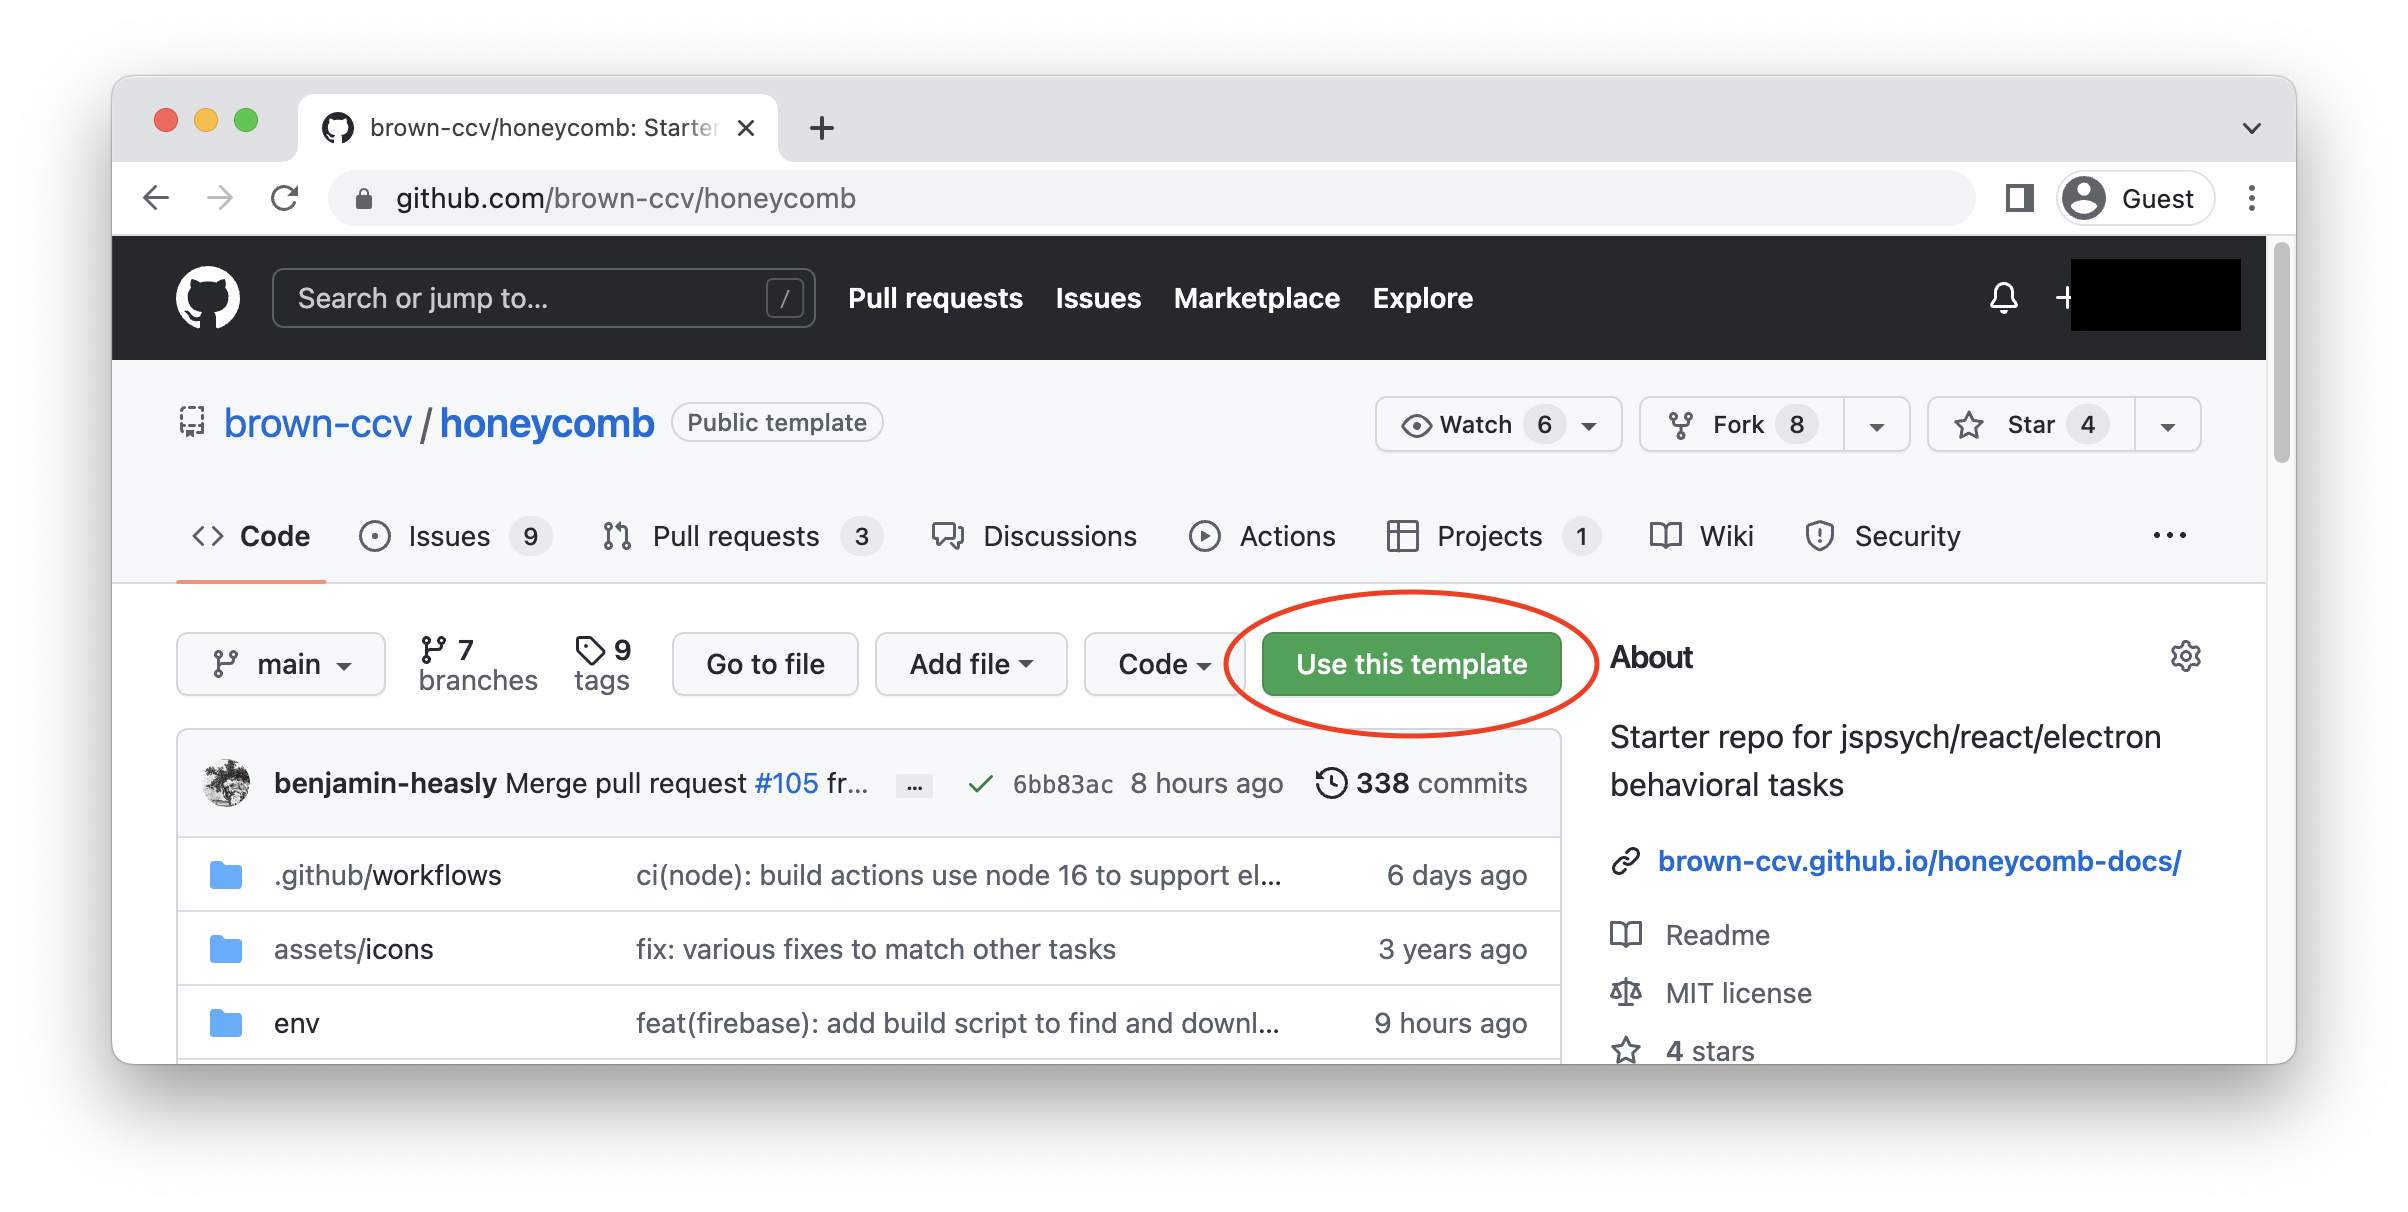
Enter the owner, name, and description of your repository and click on
Create repository from template.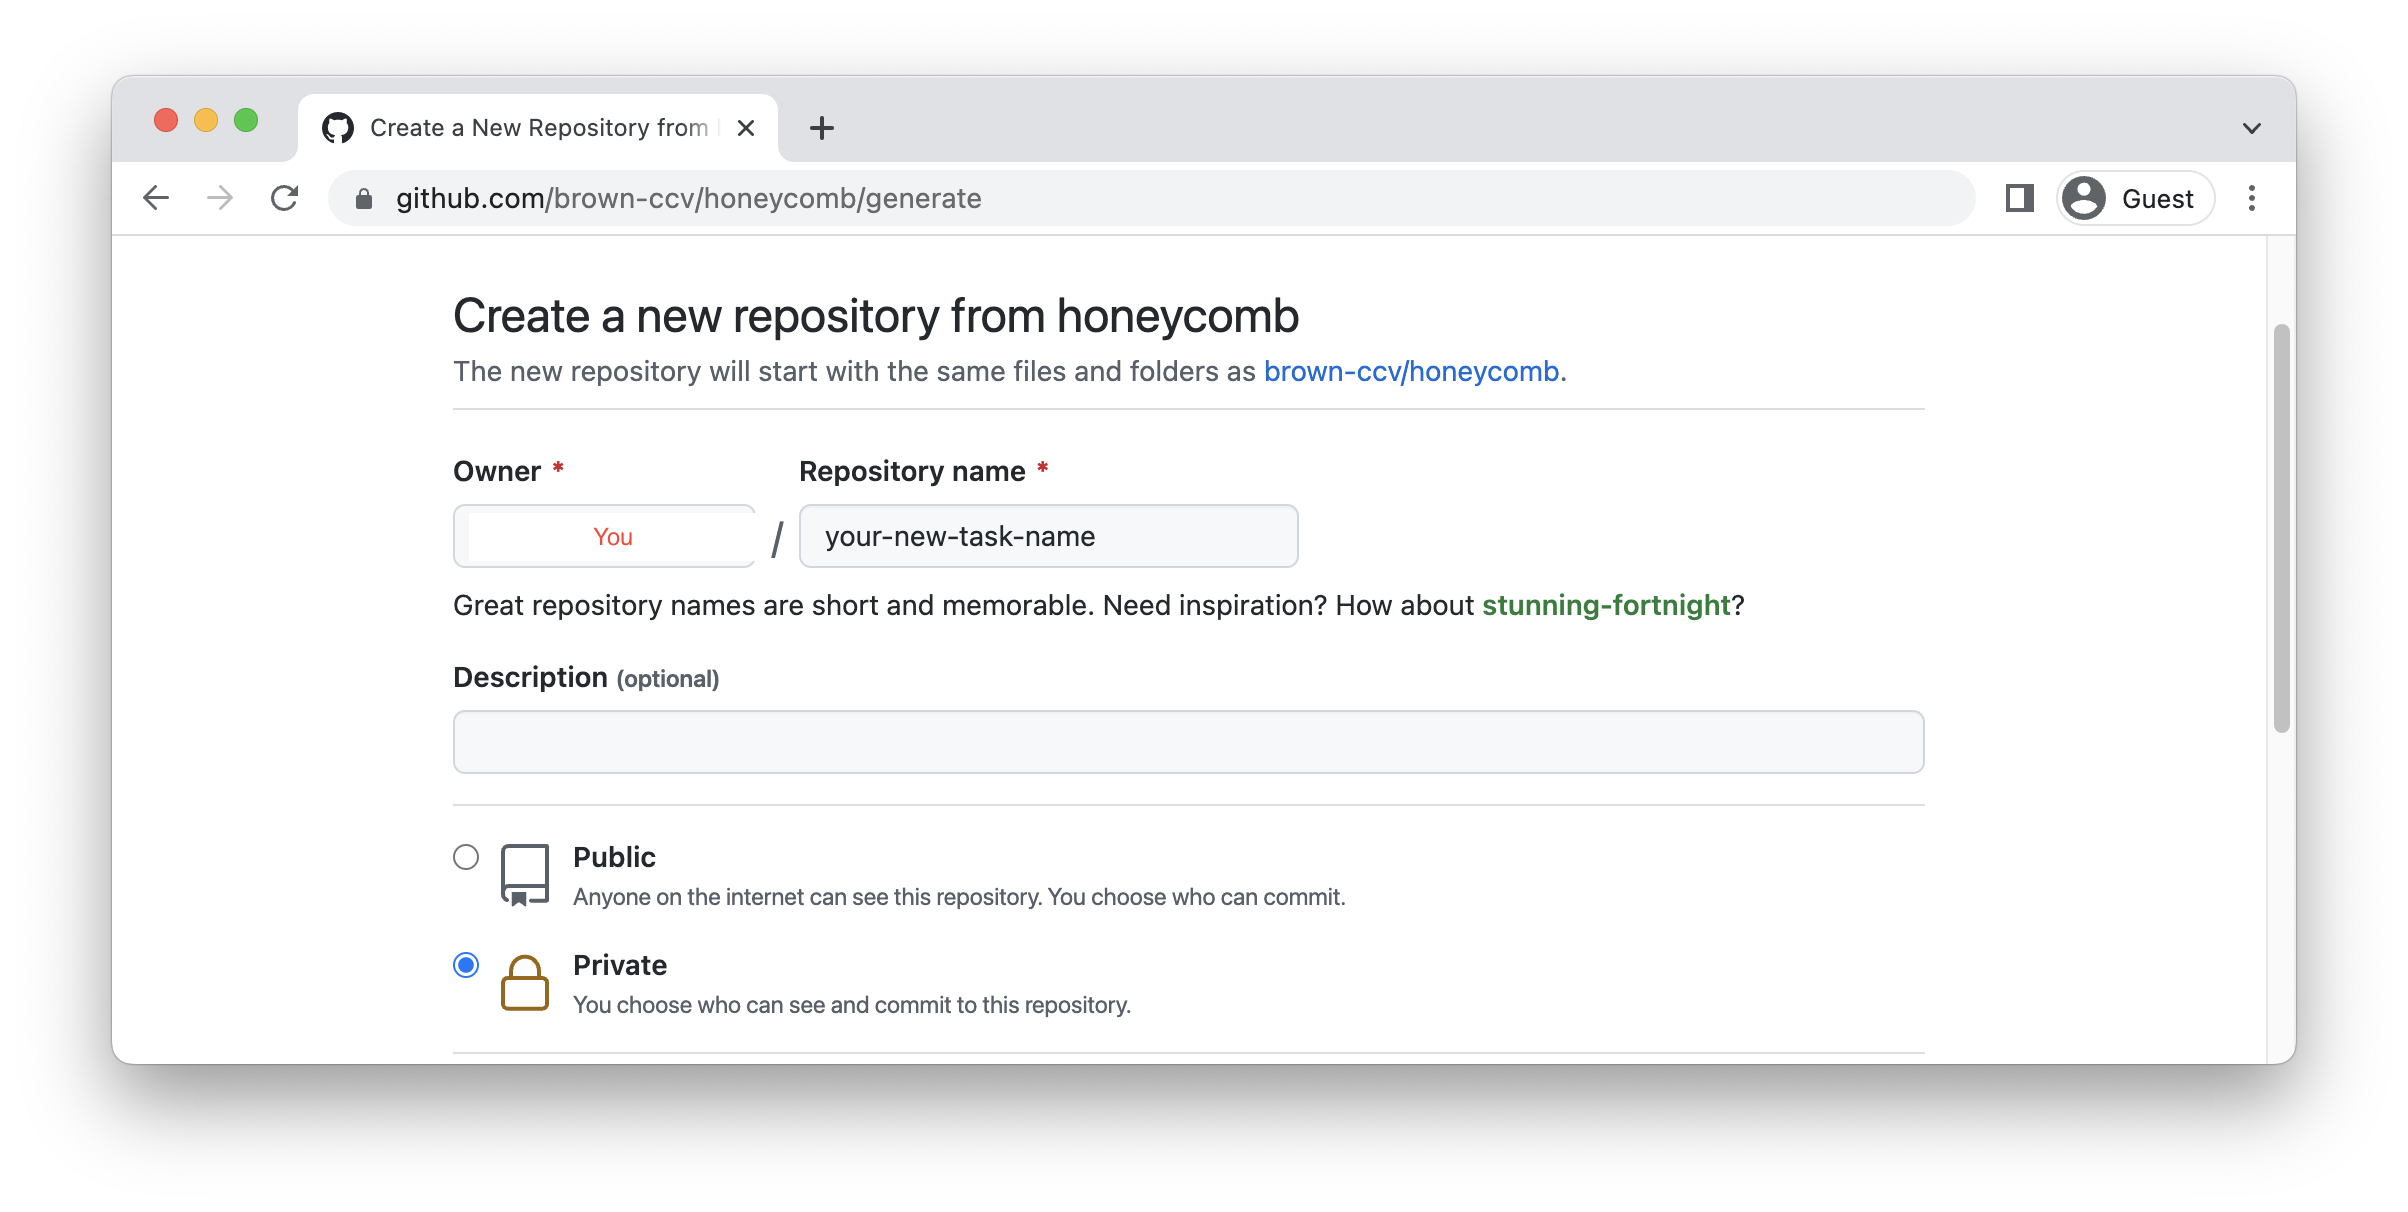 note
noteWe recommend creating a public repository and leaving
Include all branchesuncheckedEnsure the repositories workflow permissions are set to "Read and write permissions"
Settings -> Actions -> General -> Workflow permissions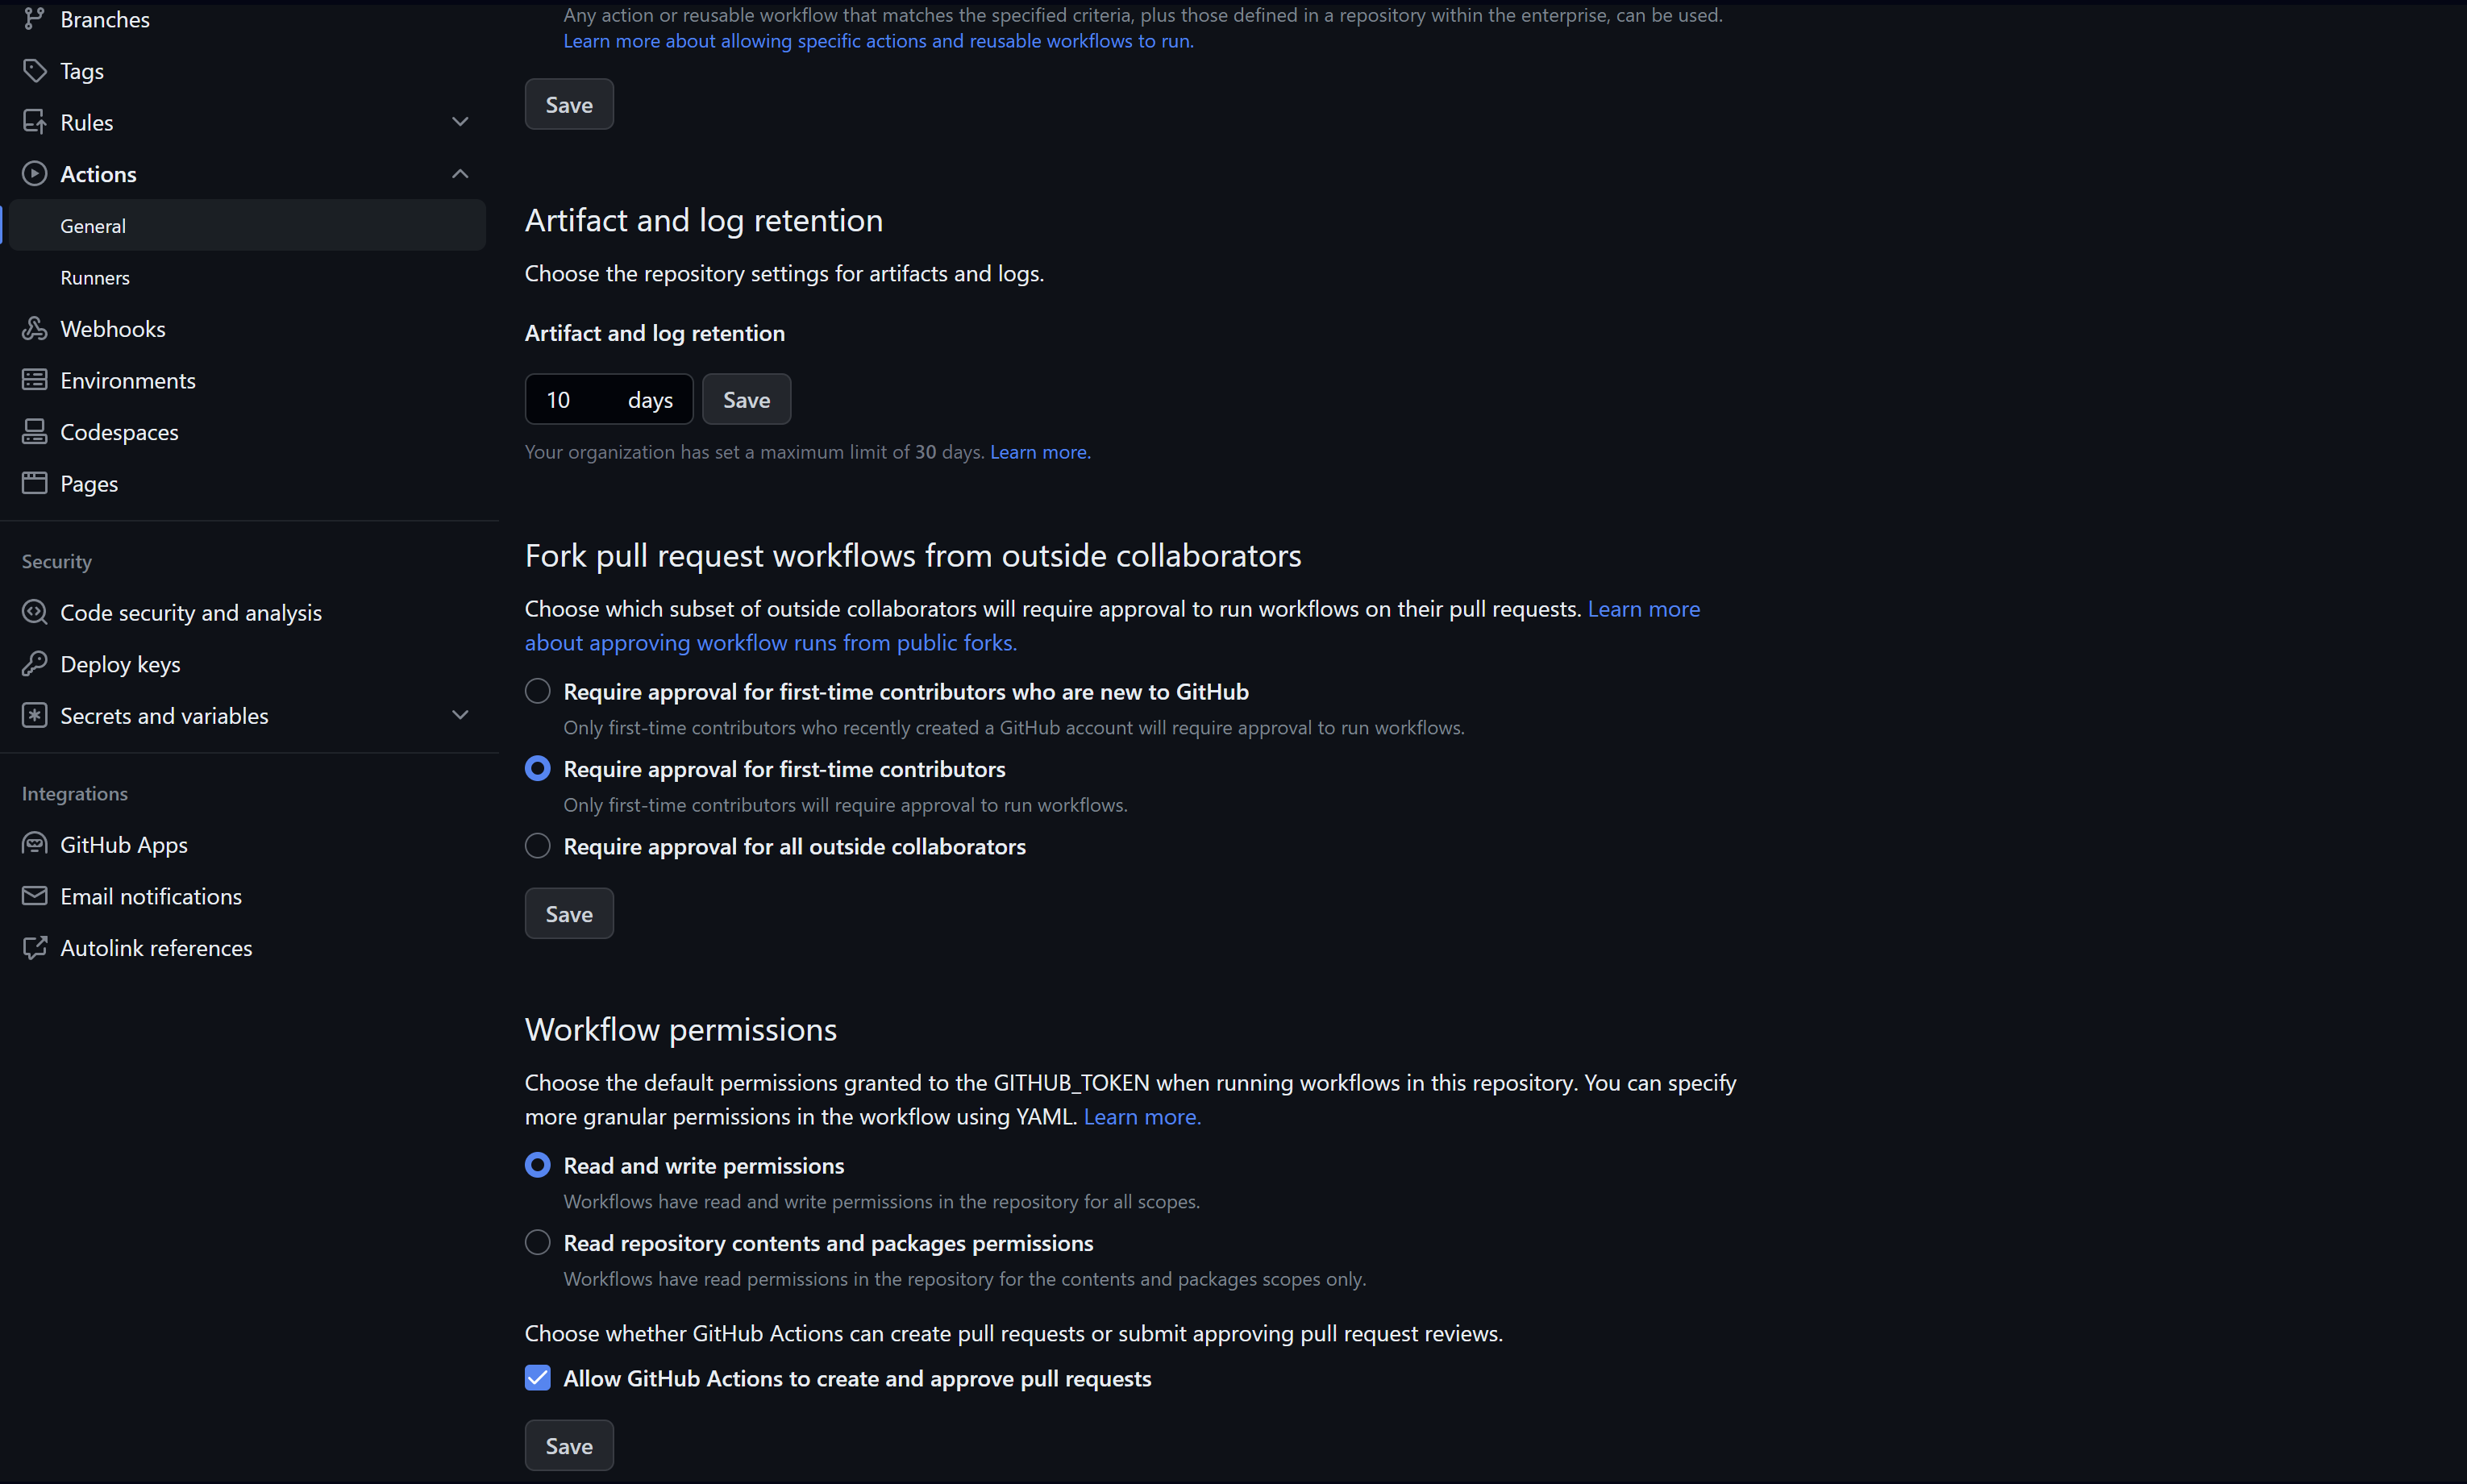
Additional details about template repositories can be found on the Github Docs.
Cloning the Repository
With the repository now setup it can be cloned onto your computer.
Navigate to the repository on GitHub.
Click the
Codebutton and copy the URL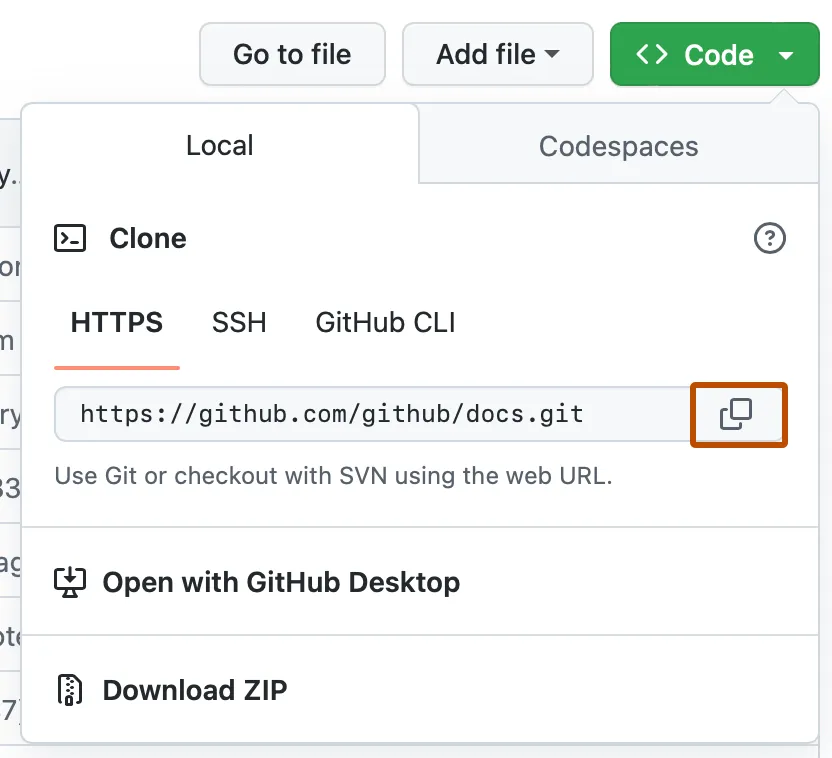
Open a terminal and navigate to where you want the cloned directory
- Windows
- macOS
cd 'path/to/directory'
cd 'path/to/directory'
- Clone the repo with the following command
git clone https://github.com/<YOUR-USERNAME>/<YOUR-REPOSITORY>
Git can be downloaded here if it is not already on your system.
Additional details and alternative methods for cloning a repository can be found on the Github Docs.
Installing Prerequisites
All of the needed programs for Honeycomb must be installed before we can develop our task. We will use a package manager to automatically install them.
See Prerequisites for more information about these programs.
Initial Install
- Windows
- macOS
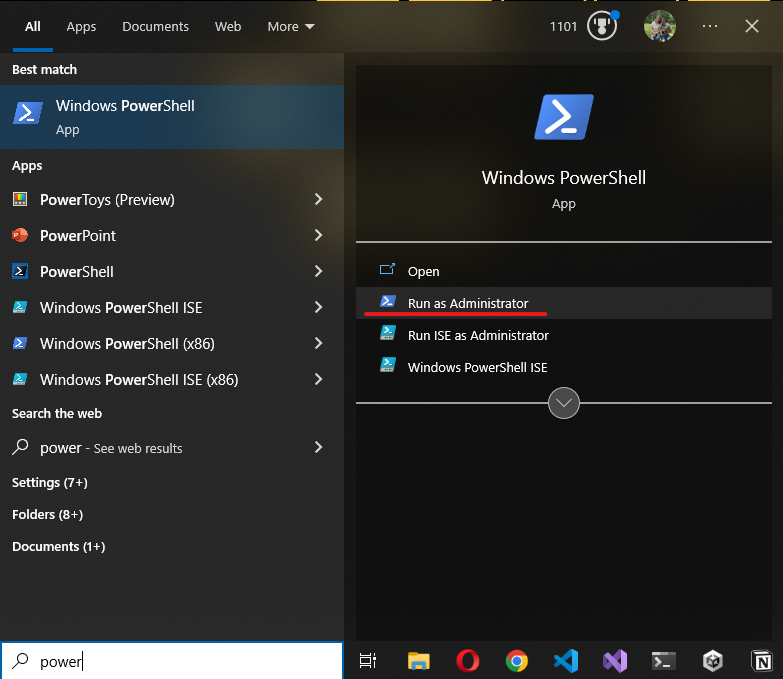
Run Powershell as an admin from the start menu
Navigate to the root directory of your cloned repository
Paste the following command and follow the prompts to install the listed programs:
./winget.ps1The "Visual Studio Installer" will open a GUI during installation. Make sure "Desktop Development with C++" is checked before continuing.
The most commonly used package manager on macOS is Homebrew.
Paste the following command in a macOS Terminal and follow the prompts to install Homebrew.
/bin/bash -c '$(curl -fsSL https://raw.githubusercontent.com/Homebrew/install/HEAD/install.sh)'Paste the following command and follow the prompts to install the listed programs:
brew bundleInstall Xcode (not available on Homebrew)
xcode-select --install
If you are running into issues after installing the packages please restart your terminal and/or reboot your computer. This should resolve most issues.
Setting Up Node
NVM (Node Version Manager) is a tool for installing and using multiple versions on node on your computer. It must first be installed:
Install NVM
- Windows
- macOS
The previous step installs NVM for Windows via the winget package manager. Note that this is a different tool than NVM with slight differences needed for compatibility with Windows.curl -o- https://raw.githubusercontent.com/nvm-sh/nvm/v0.39.4/install.sh | bashCopy the version number listed in
.nvmrc. The version may be different than the screenshot below.
Install that version.
nvm install [version]Use the needed version. This will automatically check the version listed in the
.nvmrcfile.nvm useSet the current version as your default
nvm alias default node
You can skip step 4 if you've already set a default node version in a different project.
Install Dependencies
There are many node packages used by Honeycomb that also need to be installed. Node (installed in the previous step) comes with its own package manager to install, update, and maintain these dependencies throughout the development lifecycle.
npm install
Certain dependencies are best installed globally within node. These tools will be available from the command line anywhere on your system.
npm install -g electron firebase-tools dotenv-cli
Run the Task in Development Mode
Running the task in development mode causes it to hot-reload whenever changes are made to the app. This is how you'll run the project while building your task.
npm run dev
This script launches an electron window with the task and inspector open.
You can quit the task in the middle of development if needed:
- Windows
- macOS
- Linux
Saving data
Data is saved throughout the task, even when running in development mode. The location of the task is logged at the beginning of the task wherever you ran npm run dev.
Note how the data is organized by study and participant. Every run through of the task will save the data somewhere within this folder!
Edit the Task
Now that the task is up and running we can make our first changes to the code! We'll edit the package.json file to reflect your information.
Create a new branch
git checkout -b <branch-name>Open
package.jsonand edit it to reflect your app:nameis your task's name, generally this is the name of our repositorydescriptionshould be rewritten to better match your taskauthoris your lab (or PIs) name, email, and websiteversionshould be reset to 1.0.0repositoryis the link the GitHub repository you created earlier.
Save your changes and commit them to git:
git commit -m "Commit message goes here!"Create a pull request to bring your changes into the
mainbranch
Next Steps
Honeycomb tasks can be configured to run as a web app in Firebase, or as desktop application via electron. The desktop application can receive port signals from EEG, cameras, foot pedals, and more.
The Firebase page explains how to set up your task with Firebase.
To learn more about how to configure your task for these different scenarios, see Environment Variables.
The NPM Scripts page lists every script you can run and which environment they use.